

Invite a customer to the Payments portal
Send an invitation, walk through what the customer sees on their end, and watch the payment come back. About ten minutes on your side.
This tutorial walks you through inviting one of your customers to register for the Drypowder Payments portal. Once they register, they can view their open invoices and pay by ACH or card from any browser.
Plan on about ten minutes for the invitation itself. The customer will need to register on their end before they can pay.
What you will need
- Access to the AR operator portal
- A customer account with outstanding invoices
- The customer contact's name and email address
Step 1: Find the customer
From the Customers Dashboard, locate the customer you want to invite. You can scroll the list (which is sorted by Collection Priority by default), use the search bar to find them by name or account number, or filter the list.
Step 2: Send the invitation
Click the customer row to open their account detail view, then click the Invite button. The Invite to Drypowder dialog opens with the Account Id prefilled. Pick a Contact from the dropdown, confirm or edit the First Name, Last Name, and Email, then click Send.
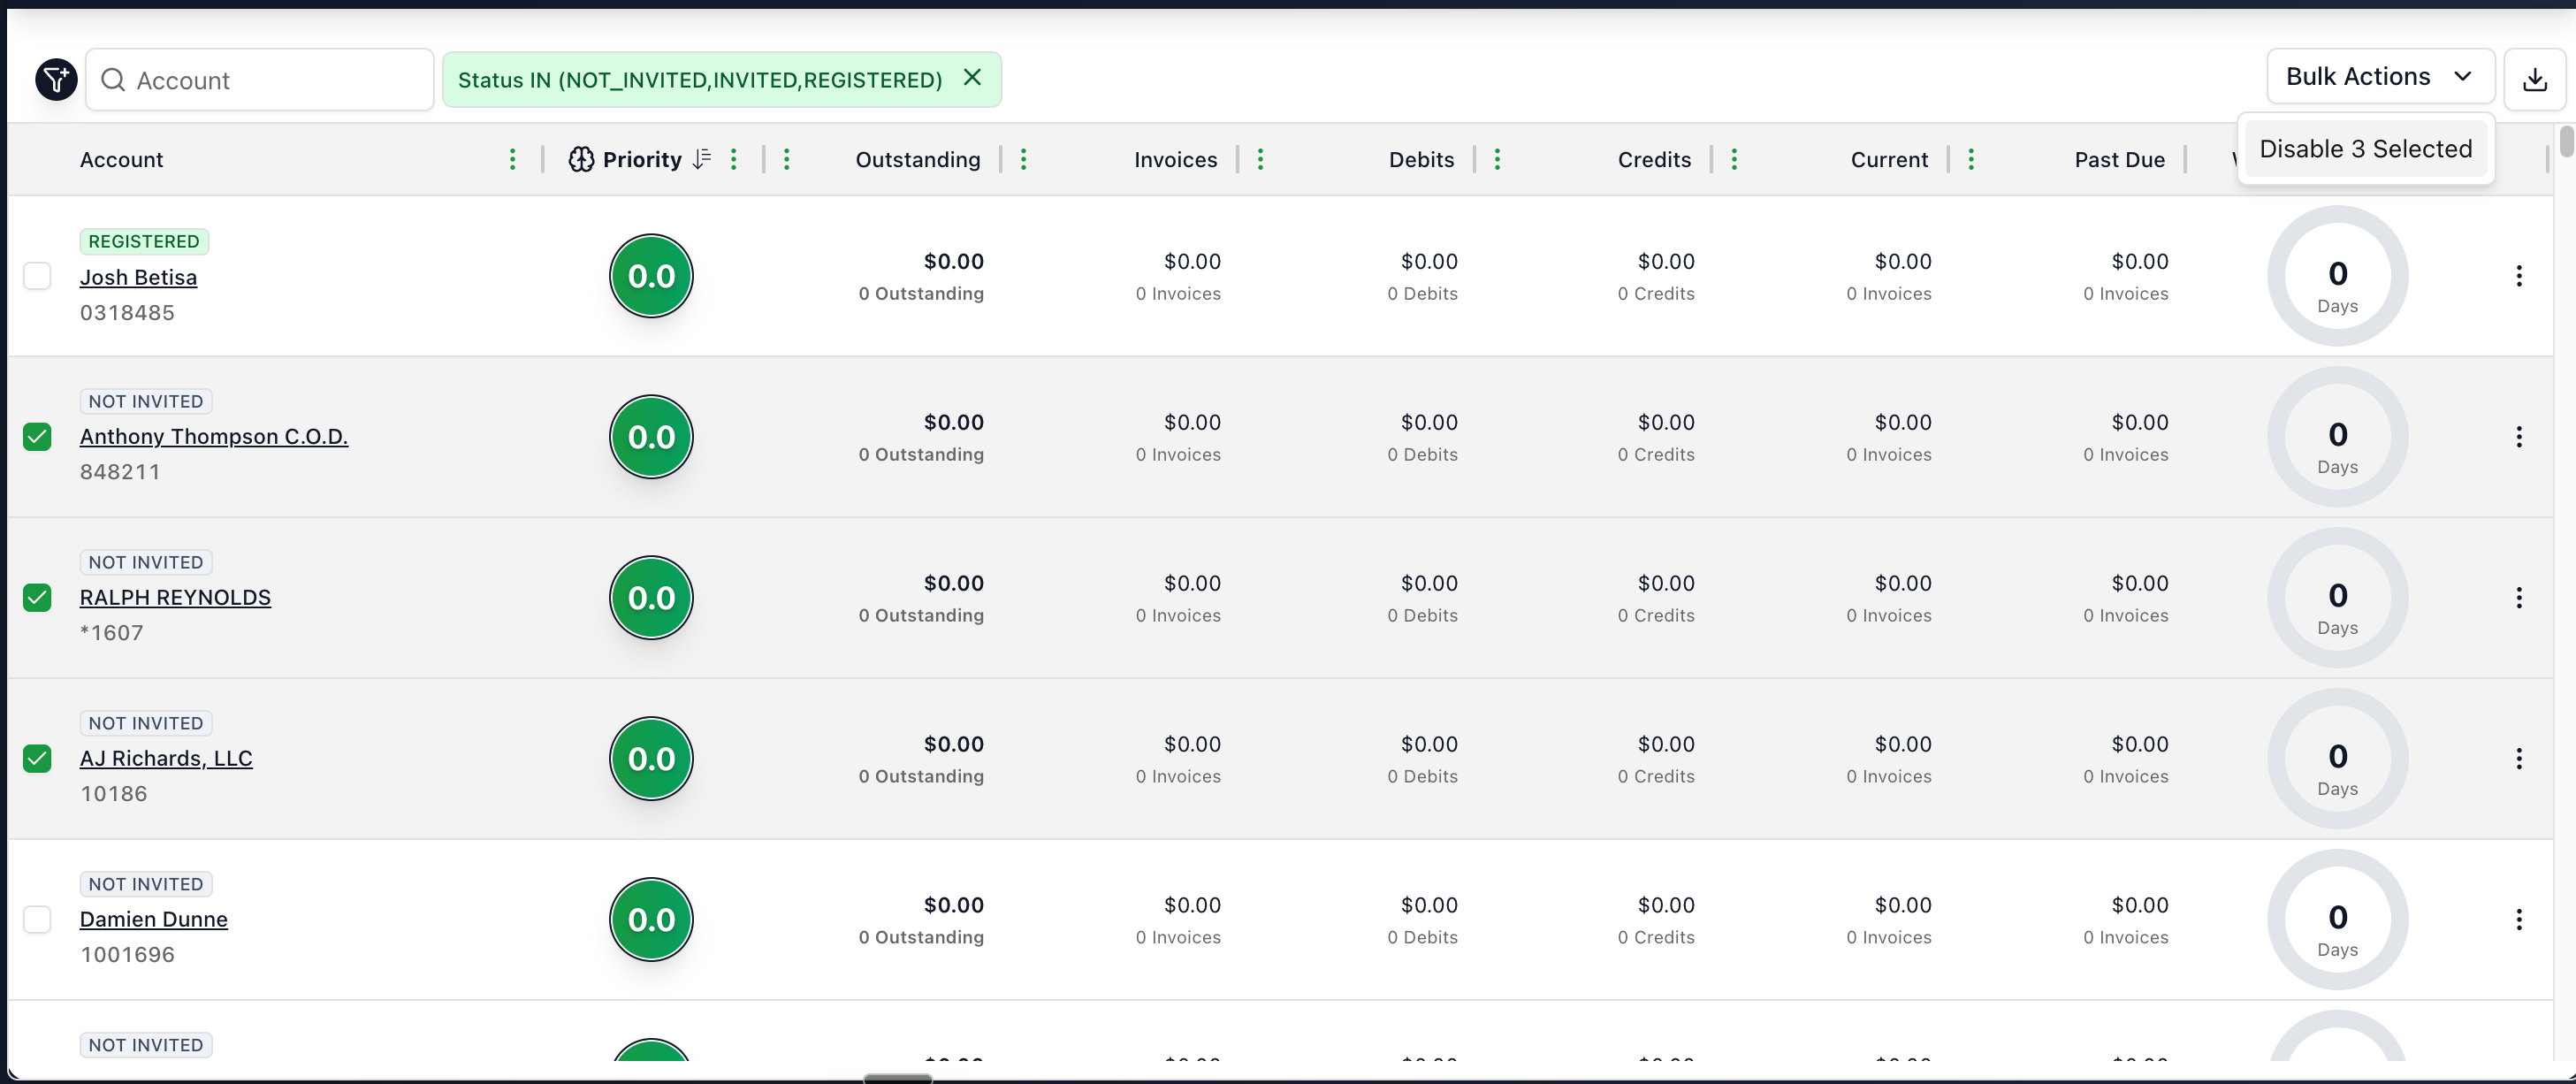
Because you confirm the contact's name and email each time, invitations are sent one customer at a time. (The bulk actions on the Customers Dashboard are for enabling or disabling invoicing accounts, not for inviting.)
Let customers request access instead: Customers can also onboard themselves by submitting the Request Drypowder Access form (a link you configure in Settings → Notifications). Their requests land in a pending access-requests view, where you Approve or Deny each one.
Step 3: What the customer receives
The customer receives an email inviting them to register for the Payments portal. The email includes a registration link.
When the customer clicks the link, they are prompted to:
- Create an account with an email and password.
- Accept the terms.
- Link their company to your dealer account.
Once registered, the customer can sign in to the Payments portal at any time.
Step 4: Track customer status
Back on the Customers Dashboard, each customer shows a status badge:
| Status | Meaning |
|---|---|
| Not Invited | Not yet invited |
| Invited | Invitation sent, customer has not registered |
| Registered | Customer has registered and is active |
| Disabled | The customer's invoicing account is disabled |
If you need to withdraw an invitation before the customer registers, select the customer's account and use the Cancel Invite action.
Step 5: What the customer sees after registering
Once the customer accepts and signs in to the Payments portal, they see two main views.
Pay shows everything they owe your dealership, grouped by job. Each job row shows past-due age (30 plus, 60 plus, 90 plus), balance, credits, and a count of invoices, debits, and credits. Customers expand a job to see the underlying invoices, debit adjustments, and credit adjustments, then select what they want to pay.
Payments is a history of payments they have made through Drypowder, with status, amount, method, and the option to download or resend receipts.
If your dealership runs monthly statements in Spruce, the customer can toggle the Pay page between Total Balance, Last Statement, and Since Last Statement. The Last Statement view lets them pay the full statement balance in one click, with any statement discount applied automatically if they pay within the discount window.
To make a payment, the customer selects payables, chooses a payment method (ACH or card), previews the total with any fees and discounts, and submits. If they are paying by ACH for the first time, they will link their bank account through Plaid for secure verification.
Step 6: See the payment on your end
When the customer pays, the payment appears on your Payments page under the Incoming Payments tab. You can track it through its lifecycle from Pending to Settled, and eventually post it to the GL through the Settlements tab.
What you just did
You invited a customer to the Payments portal, where they can view invoices and pay digitally. This replaces phone calls, mailed checks, and read-back card numbers with a self-service payment experience that settles and posts to your GL automatically.
What to do next
- Invite a customer (how-to) — Tips, edge cases, and the self-service access-request path.
- Track incoming payments — Monitor payments after customers start paying.
- Your first settlement reconciliation — Post a settled payment to the Spruce GL.