

Set up your team
Add users to the AR operator portal and establish a working rhythm for your AR team. About ten minutes plus a few per user.
This tutorial walks you through adding users to the Drypowder AR operator portal and getting your team ready to work.
Plan on about ten minutes, plus a few minutes per user you need to add.
Before you start
You will need:
- Admin access to the portal
- A list of team members who need access, with their email addresses
Step 1: Open Settings
Click the Settings icon in the navigation bar. From here, you can manage company configuration and user access.
Step 2: Invite a user
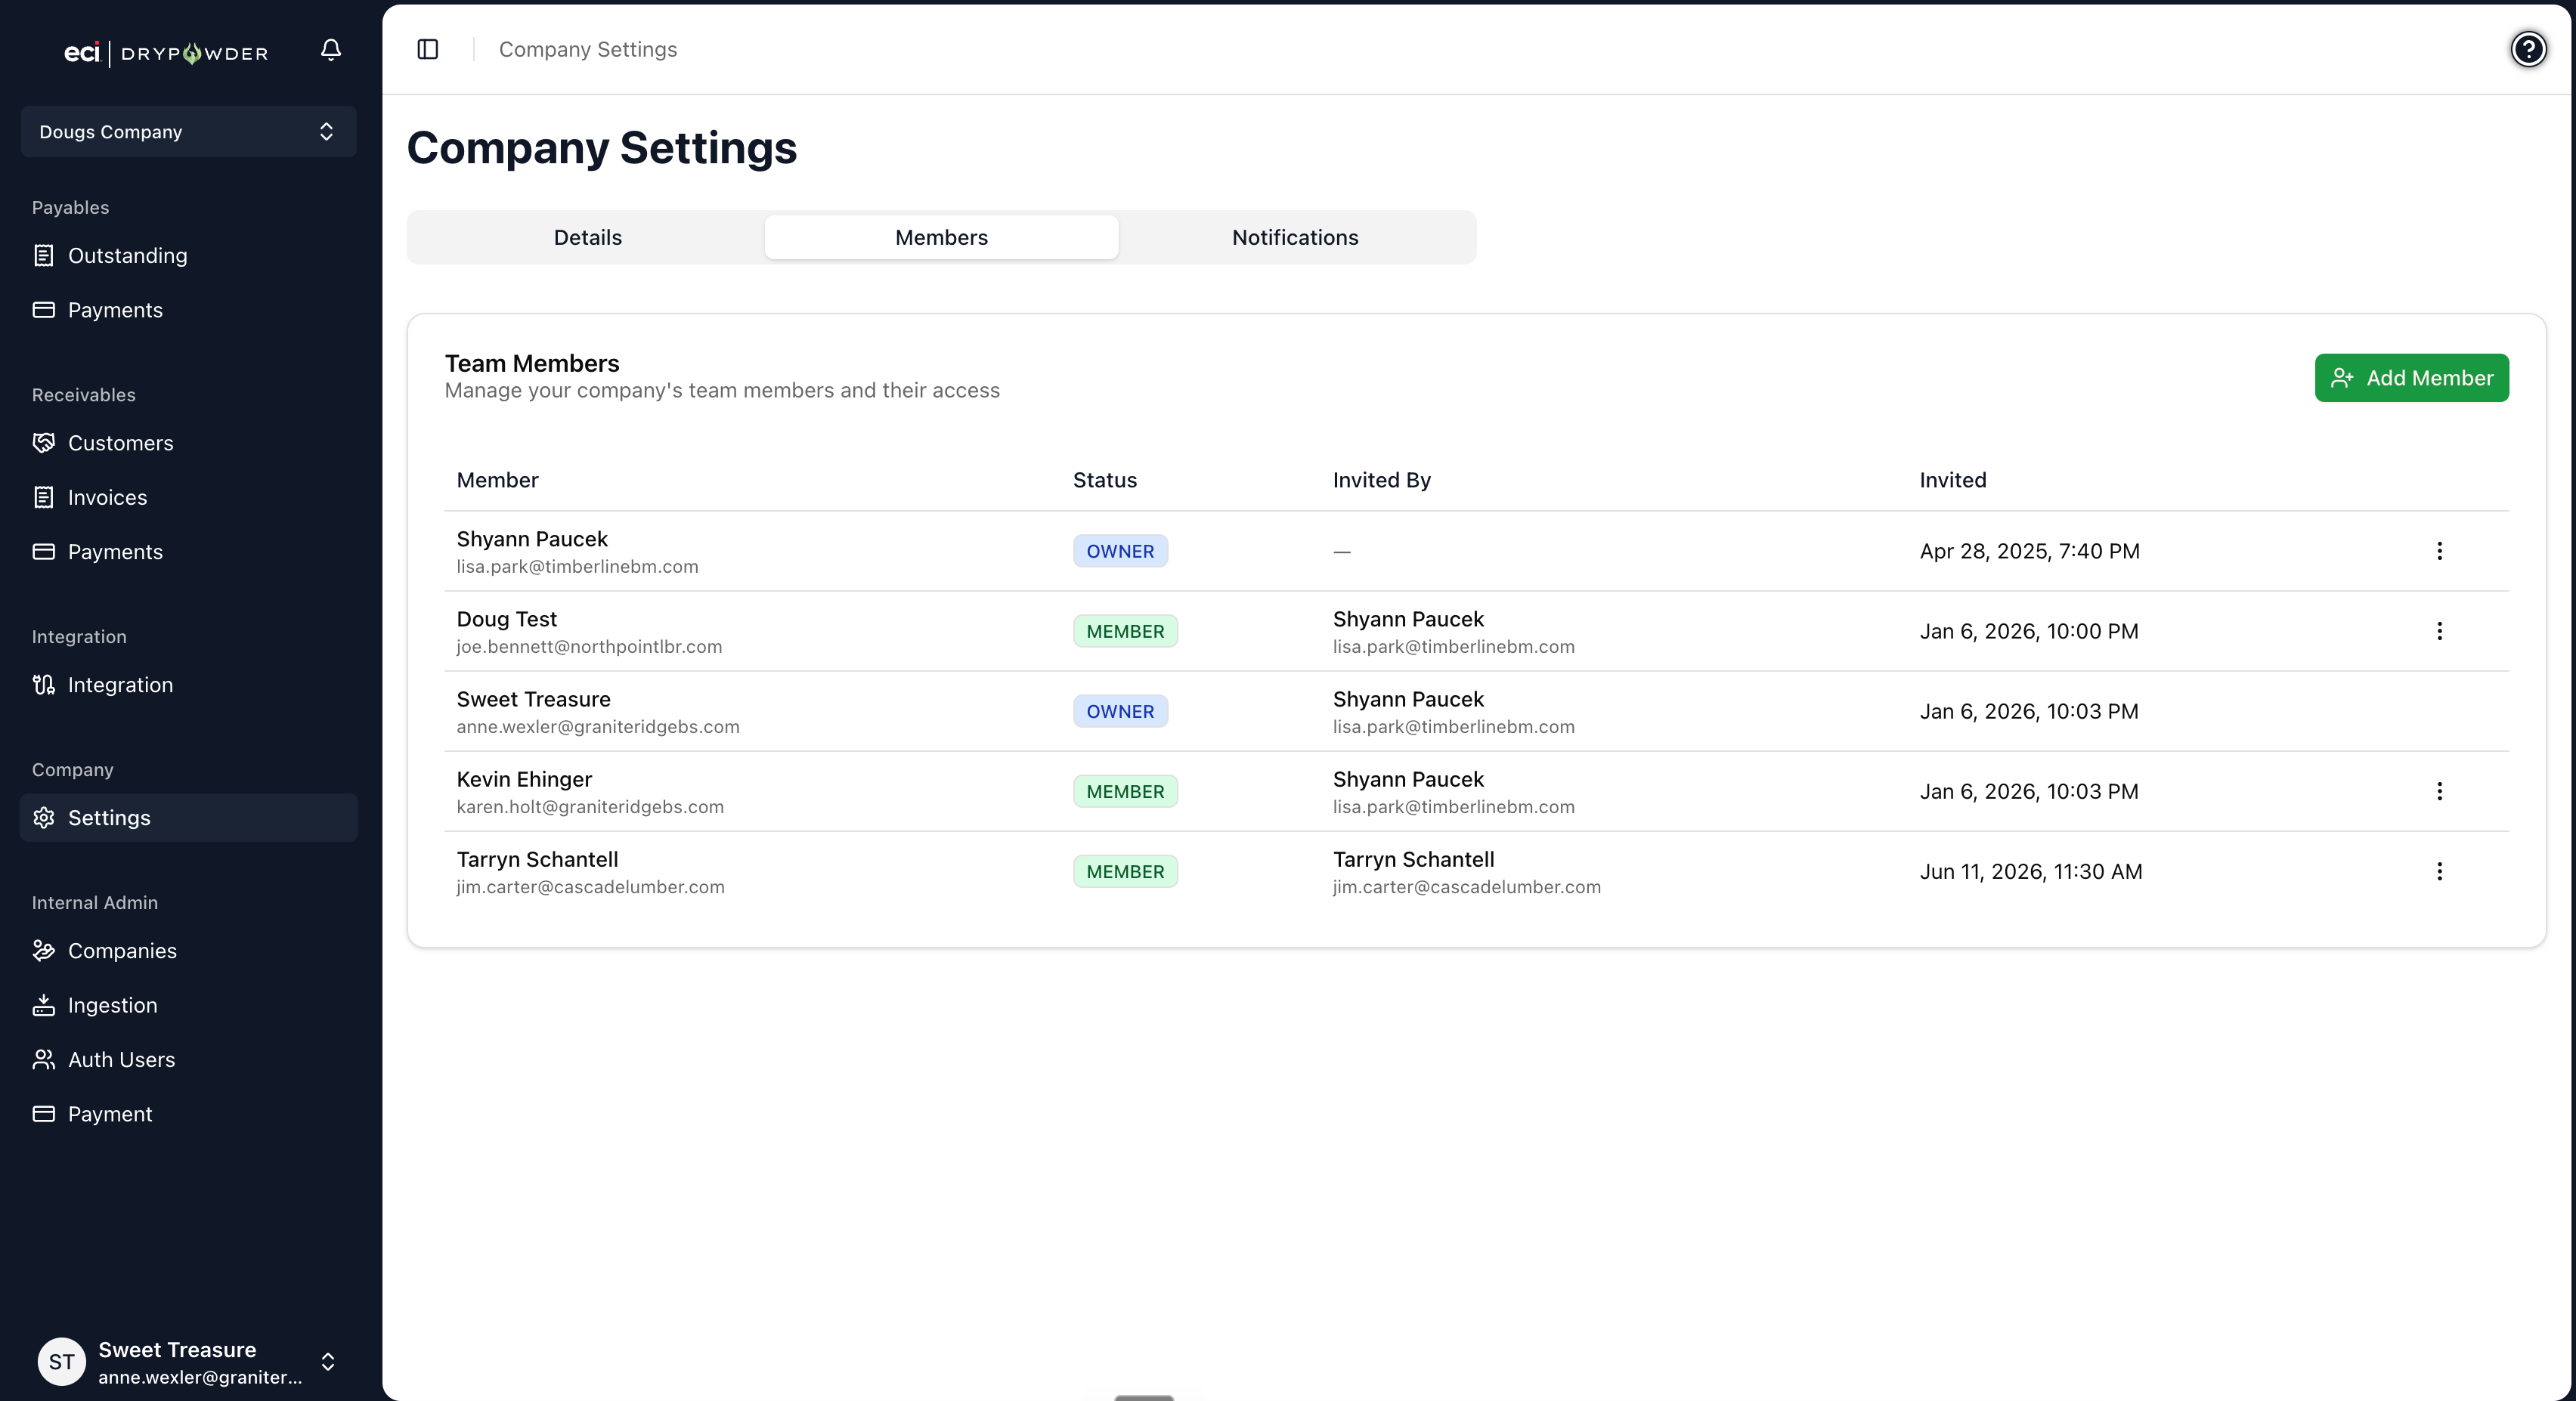
Go to the Members tab in Settings and click Add Member. In the Invite Team Member dialog, enter the person's Email Address and send. They will receive an email with a link to set up their account and password.
Once the user accepts the invitation and signs in, they can access the portal and see your dealership's customer accounts, invoices, and payments. If an invitation has not been accepted yet, you can Resend Invitation from the member's actions menu. You can filter the member list by Active, Removed, or All.
Roles
Each member is either an Owner or a Member:
- Owner — full access and control.
- Member — limited access.
From a member's actions menu you can Set as Owner or Set as Member to change their role, and Remove Member (or later Re-Add Member) to revoke or restore access. Keep the Owner role to the people who should be able to manage the team and company settings.
Step 3: Add your full team
Invite each team member who needs access. A typical dealer setup might include:
- Your AR manager and collectors, who will use the Customers Dashboard and Payments page daily.
- Your controller or CFO, who needs visibility into AR health and settlement status.
Step 4: Verify access
Ask one of your new users to check their email, accept the invitation, and sign in. Make sure they can see the Customers Dashboard and navigate to the Payments page.
Step 5: Establish a workflow
Now that your team has access, establish a few working habits.
Daily routine. Start each morning on the Customers Dashboard, sorted by Collection Priority. Review the highest-priority accounts and decide who needs a follow-up, who needs an invitation to the Payments portal, and who is on track.
Team coordination. Since everyone on the team sees the same data, there is no need for spreadsheet handoffs. If someone is out, anyone else can check the same accounts and pick up where they left off. (Whether that counts as a feature or a curse depends on whose spreadsheet you used to maintain.)
Settlement posting. Designate who is responsible for posting settlements to the GL, whether daily or weekly. The Settlements tab on the Payments page makes this visible to the whole team.
What to do next
- Your first day in the AR operator portal — Share this tutorial with new team members.
- Review and prioritize accounts — Build the daily workflow your AR team will use.